
How to Remove Mercedes-Benz W203 Radio
There are many components behind the upper central dashboard of the Mercedes Benz W203, including stereo. If you are replacement car stereo system or need to upgrade car stereo in the center console, you will need to remove the different panels. If you have any questions, please contact us, or go to the Benz aftermarket to ask a technician to help you upgrade the stereo.
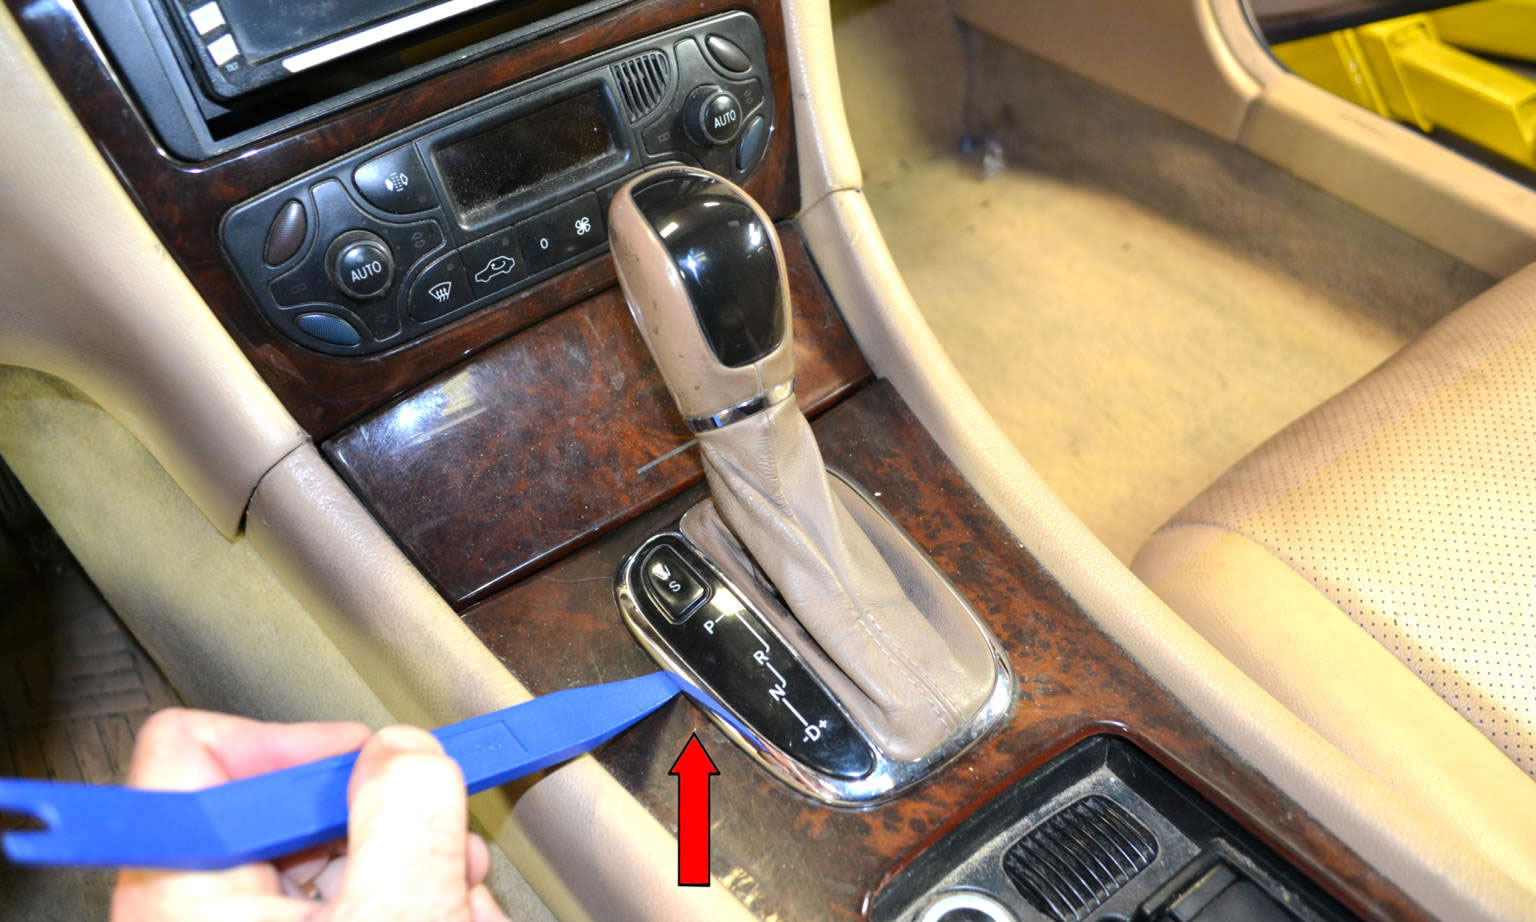
1) Begin by using your trim removal tool to lift the shifter surround from the panel. Slip the tool under the bezel (red arrow) and gently lift it up. It is just held in by pressure clips and will pop out.
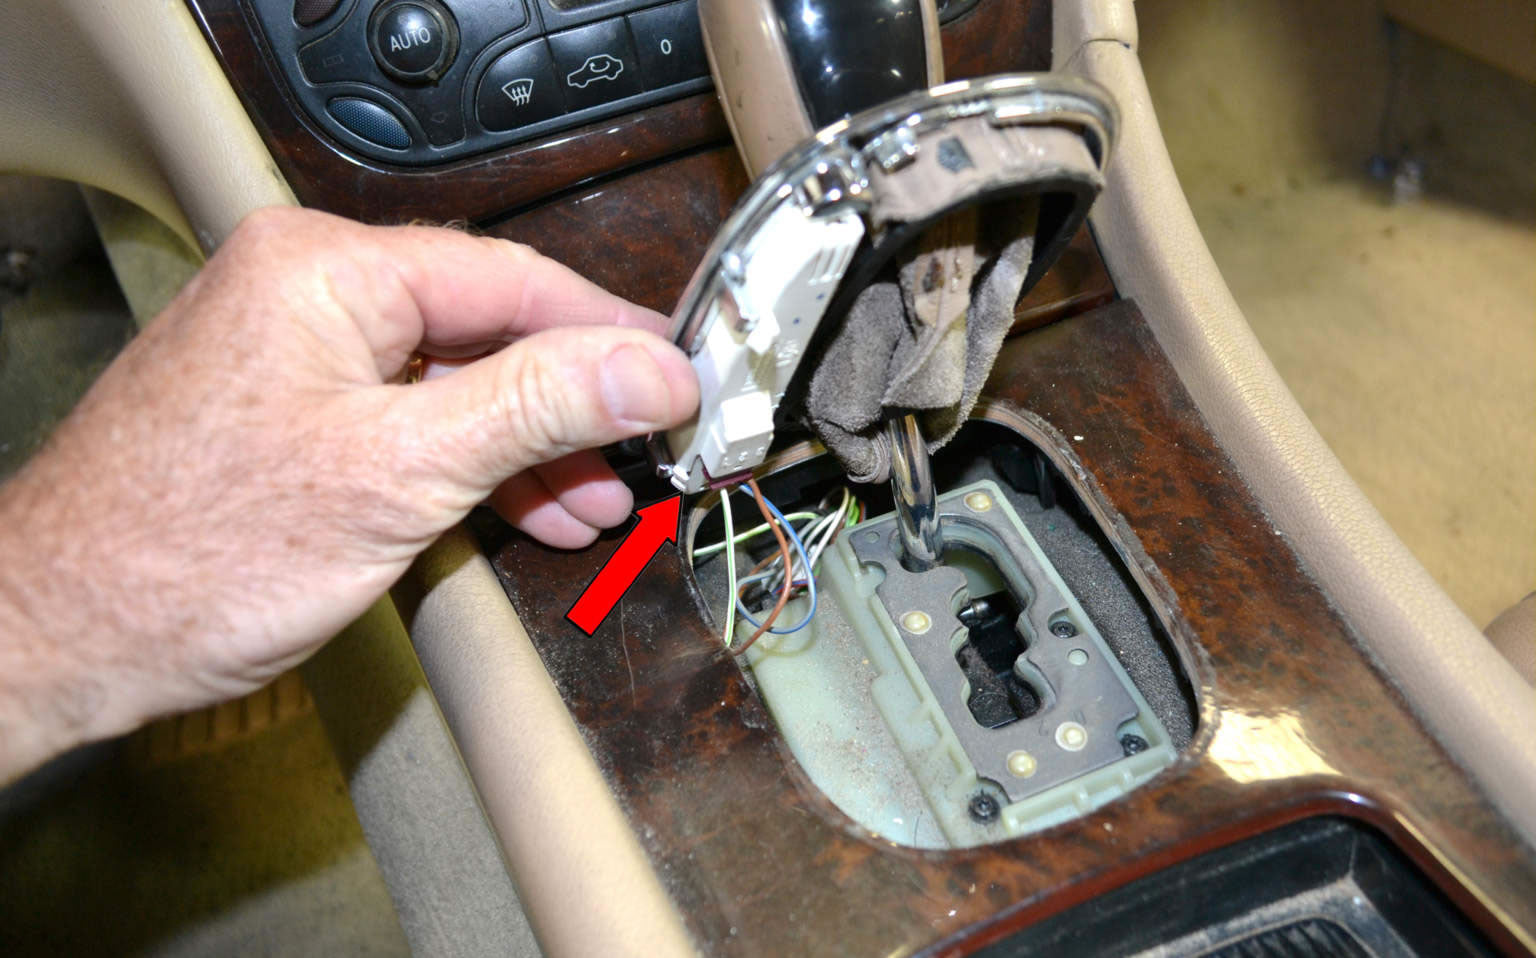
2) Turn it over and remove the electrical connectors (red arrow).
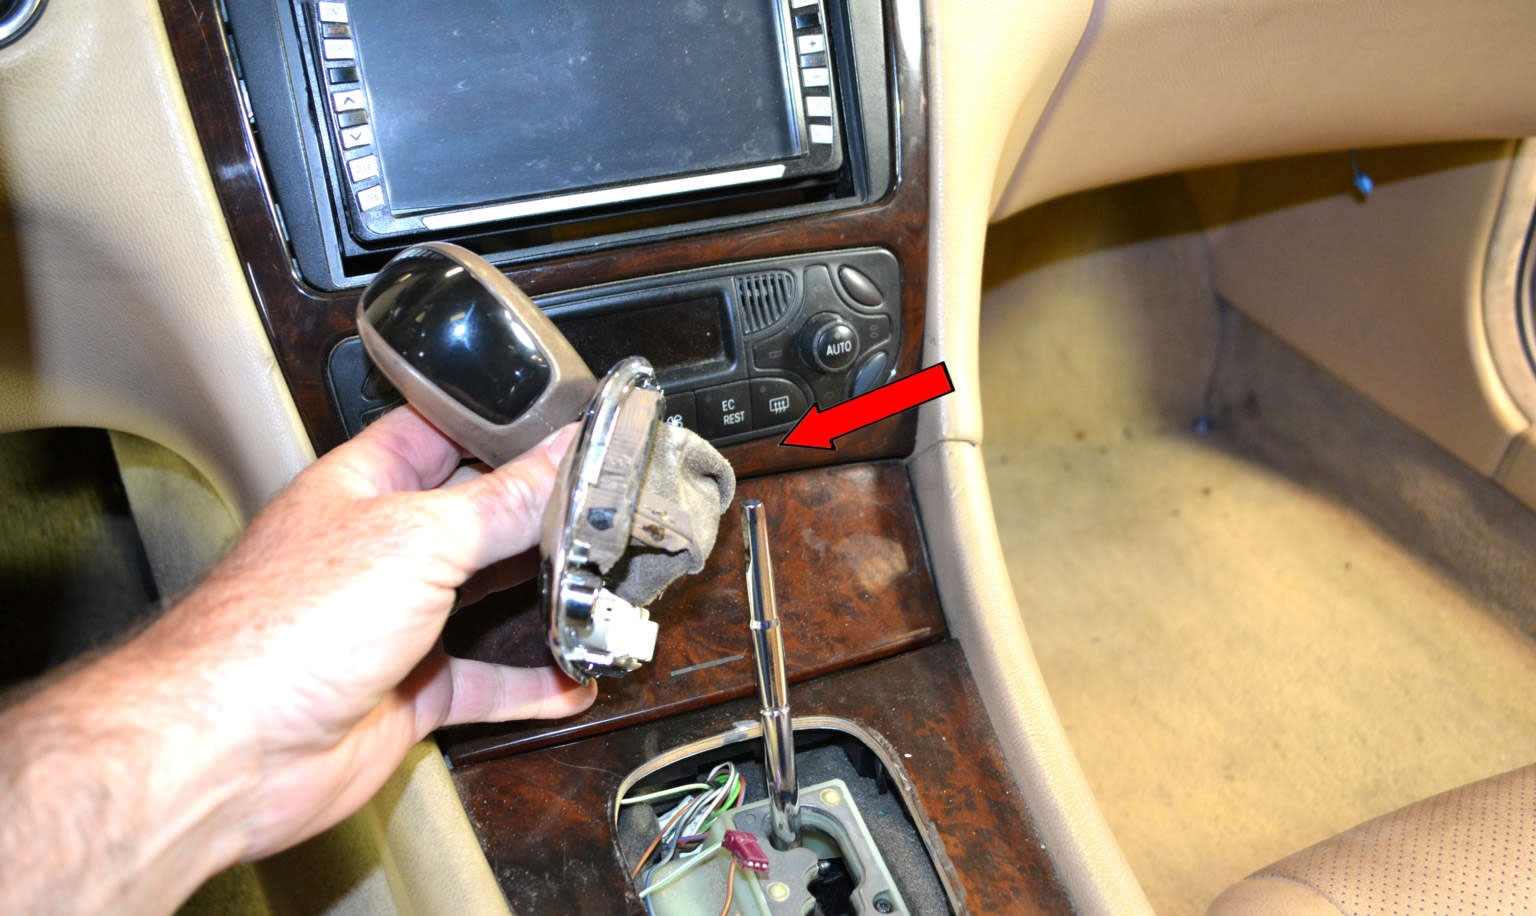
3) Lift up the leather boot and turn the knob (red arrow) on the base of the shifter.
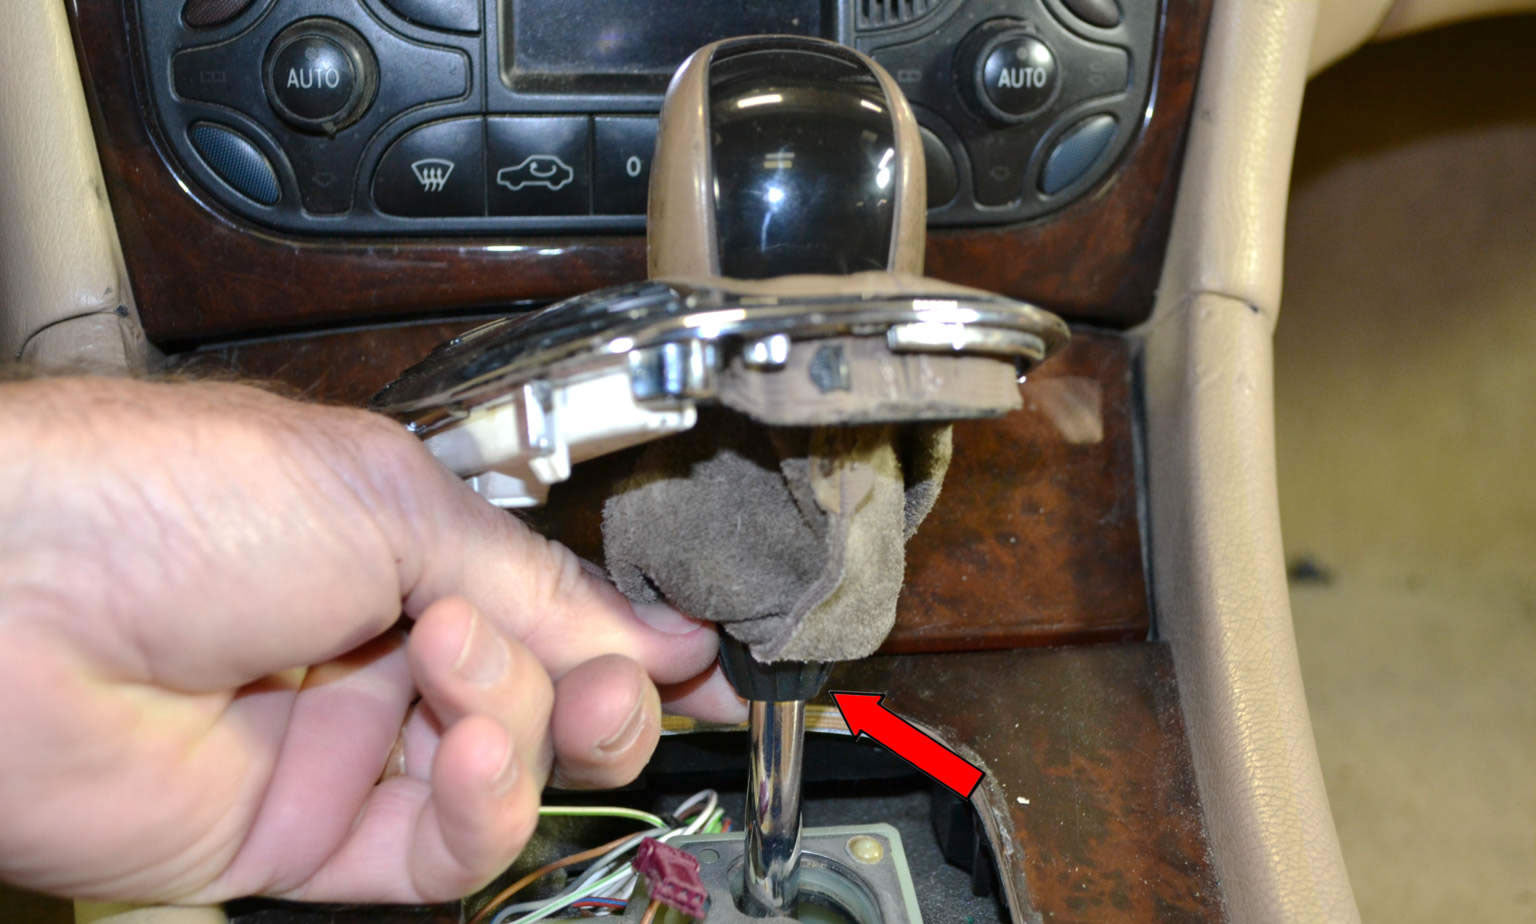
4) With the shifter loose simply grasp it and pull it straight up and off the shift rod (red arrow).
5) Open the ash tray and use your trim removal tool to gently pry up the front of the shifter plate (red arrows).

6) With the front unclipped lift it up and out of the console.

7) You are going to need the move the shifter back to remove the ash tray. Because I have disconnected the battery and even if you haven't you shouldn't be turning the key on, open the cup holder compartment and lift out the coin slot (red arrow).
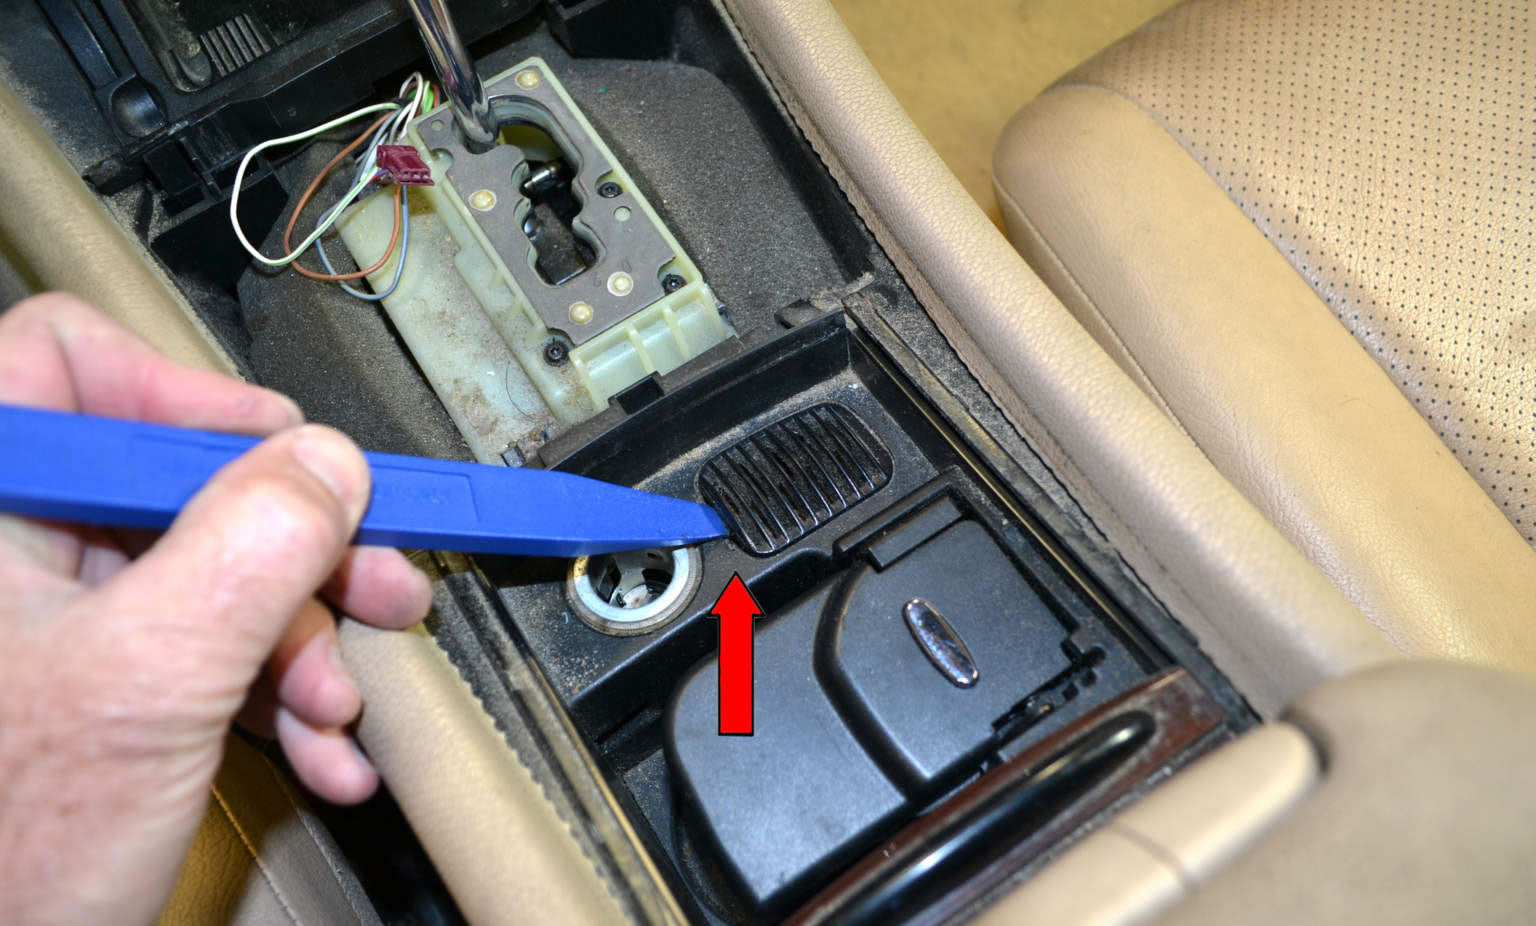
8) Under the coin slot is a plastic tab that will allow you to move the transmission shifter without turning the key. Make sure the parking brake is on and push down on the tab (red arrow) and pull the shifter back to drive.

9) Unclip the two tabs (red arrows) holding the ash tray in place. and pull it straight back and out of the console.
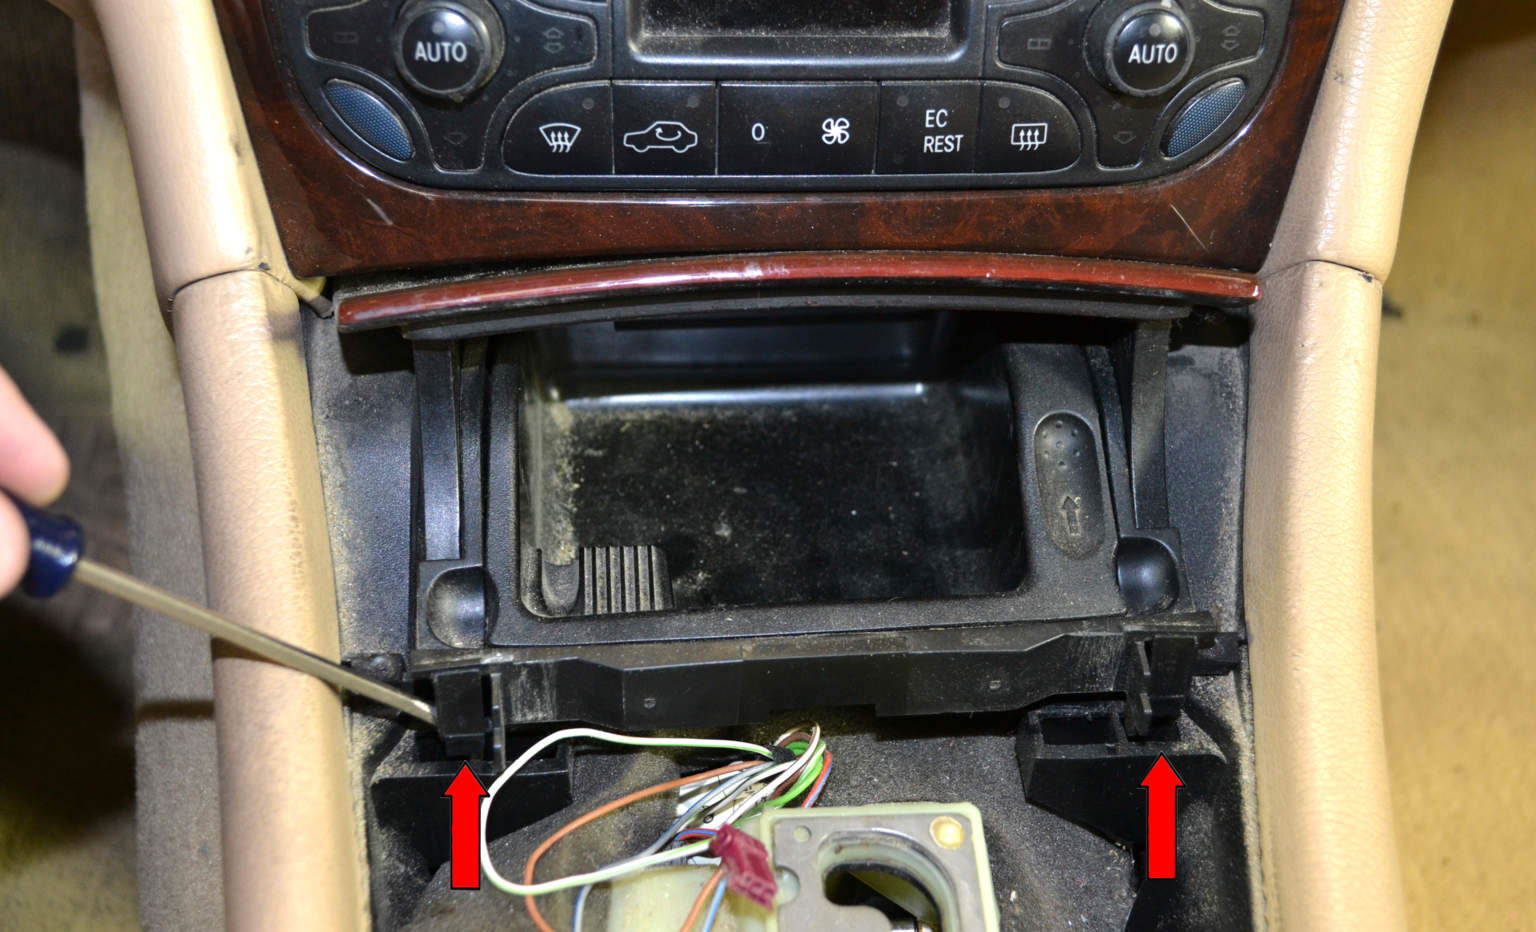
10) With the ash tray (red arrow) unclipped pull it straight back and out of the console.

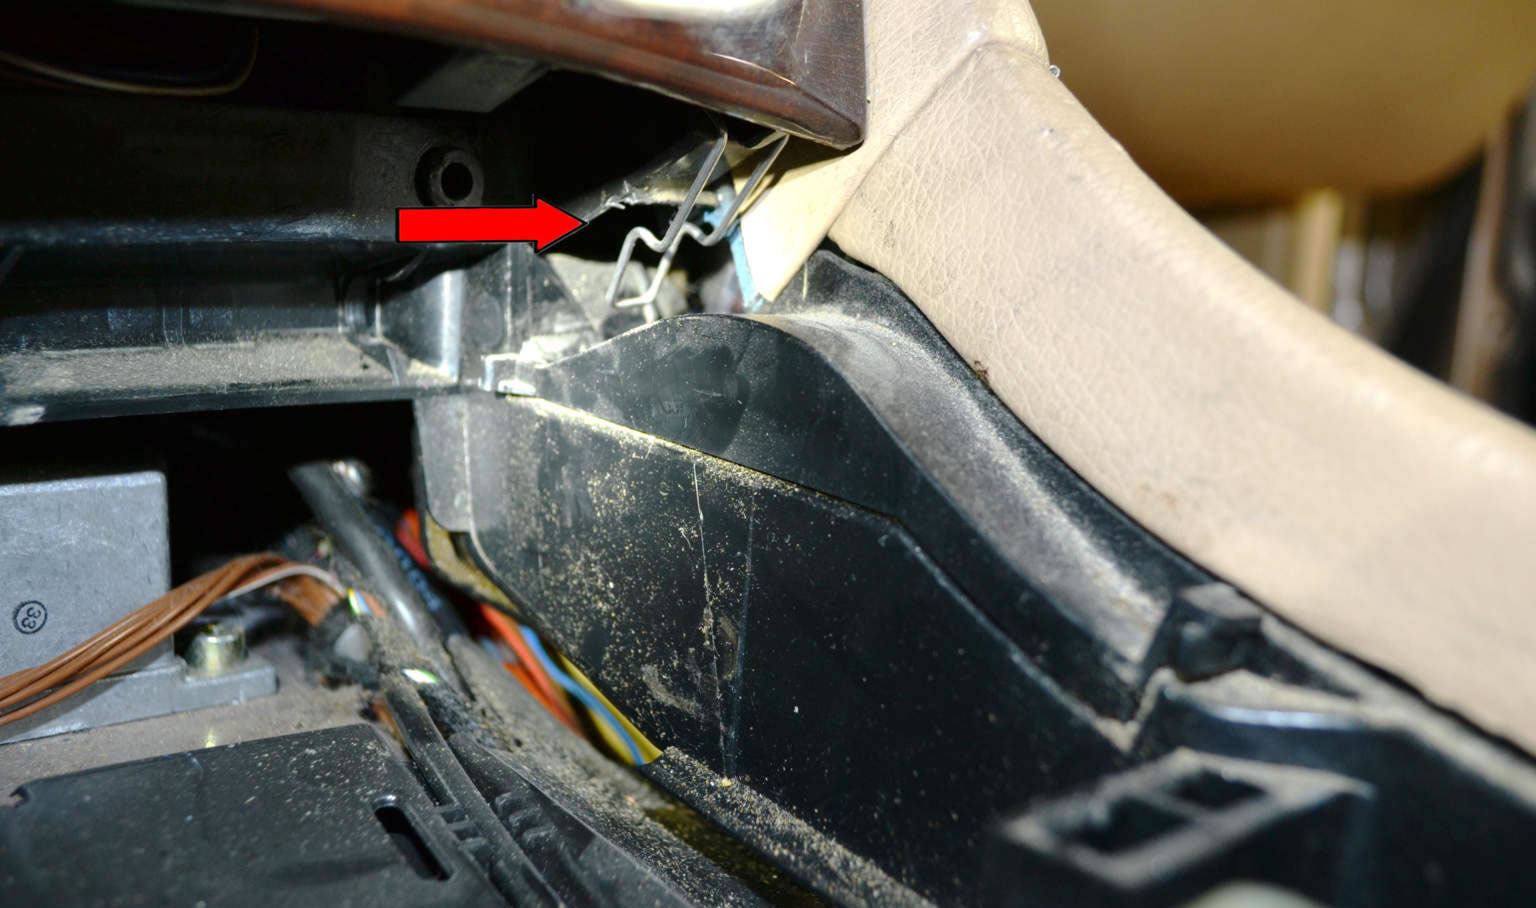
11) With the ash tray removed you can see the two clips (red arrow, one shown) holding the lower portion of the climate control panel to the console. Unclip these clips.
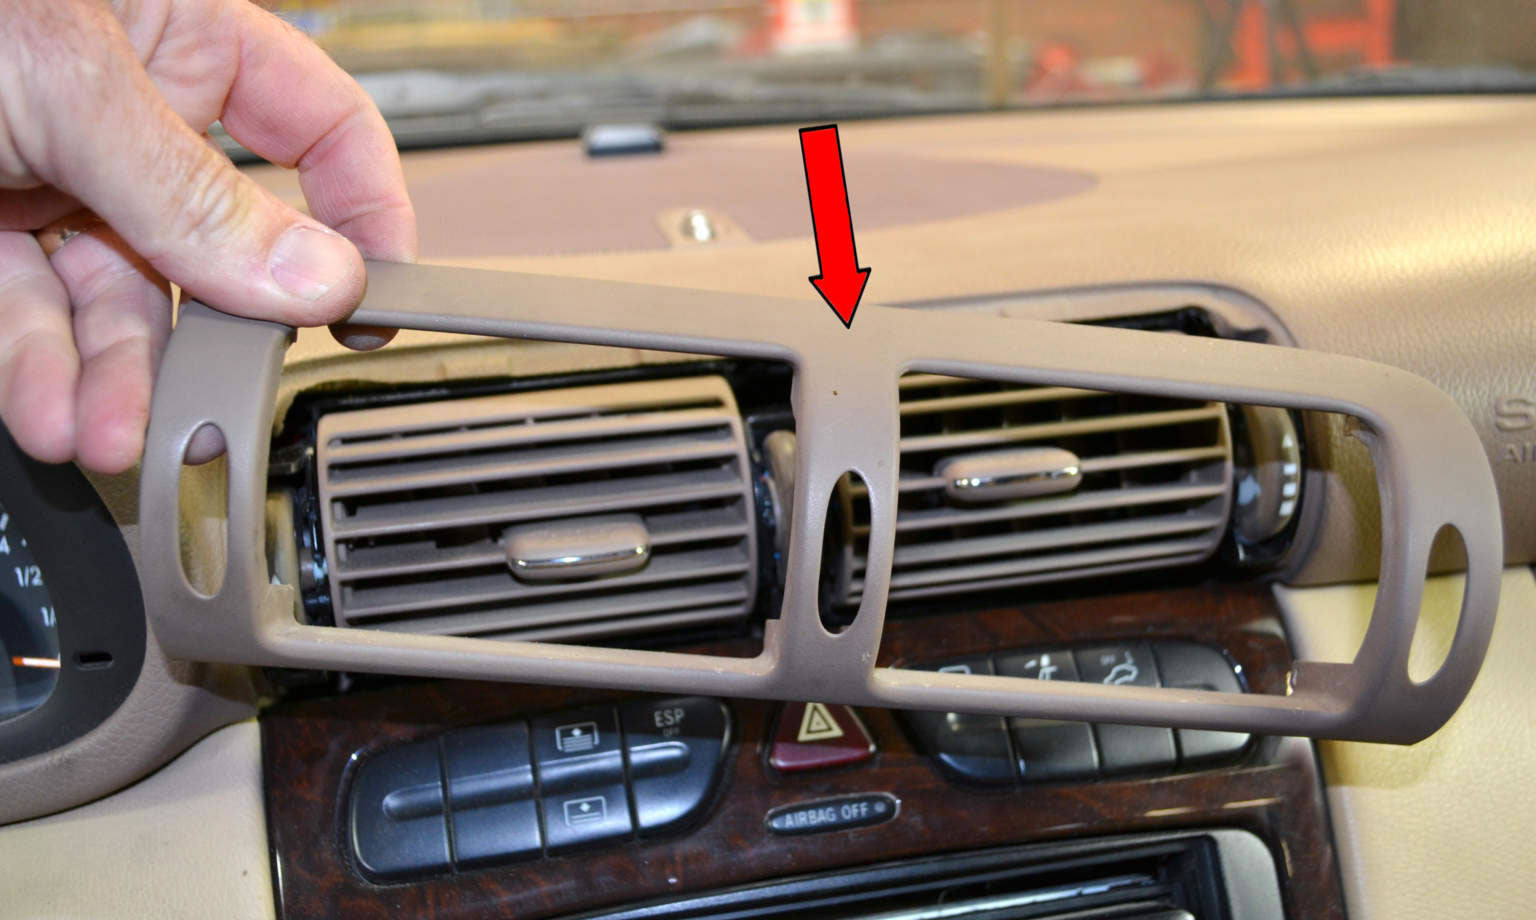
12) Move to the center vents and use your trim removal tool to gently pry the vent cover away from the vents (red arrows).

13) Remove the vent face plate (red arrow).
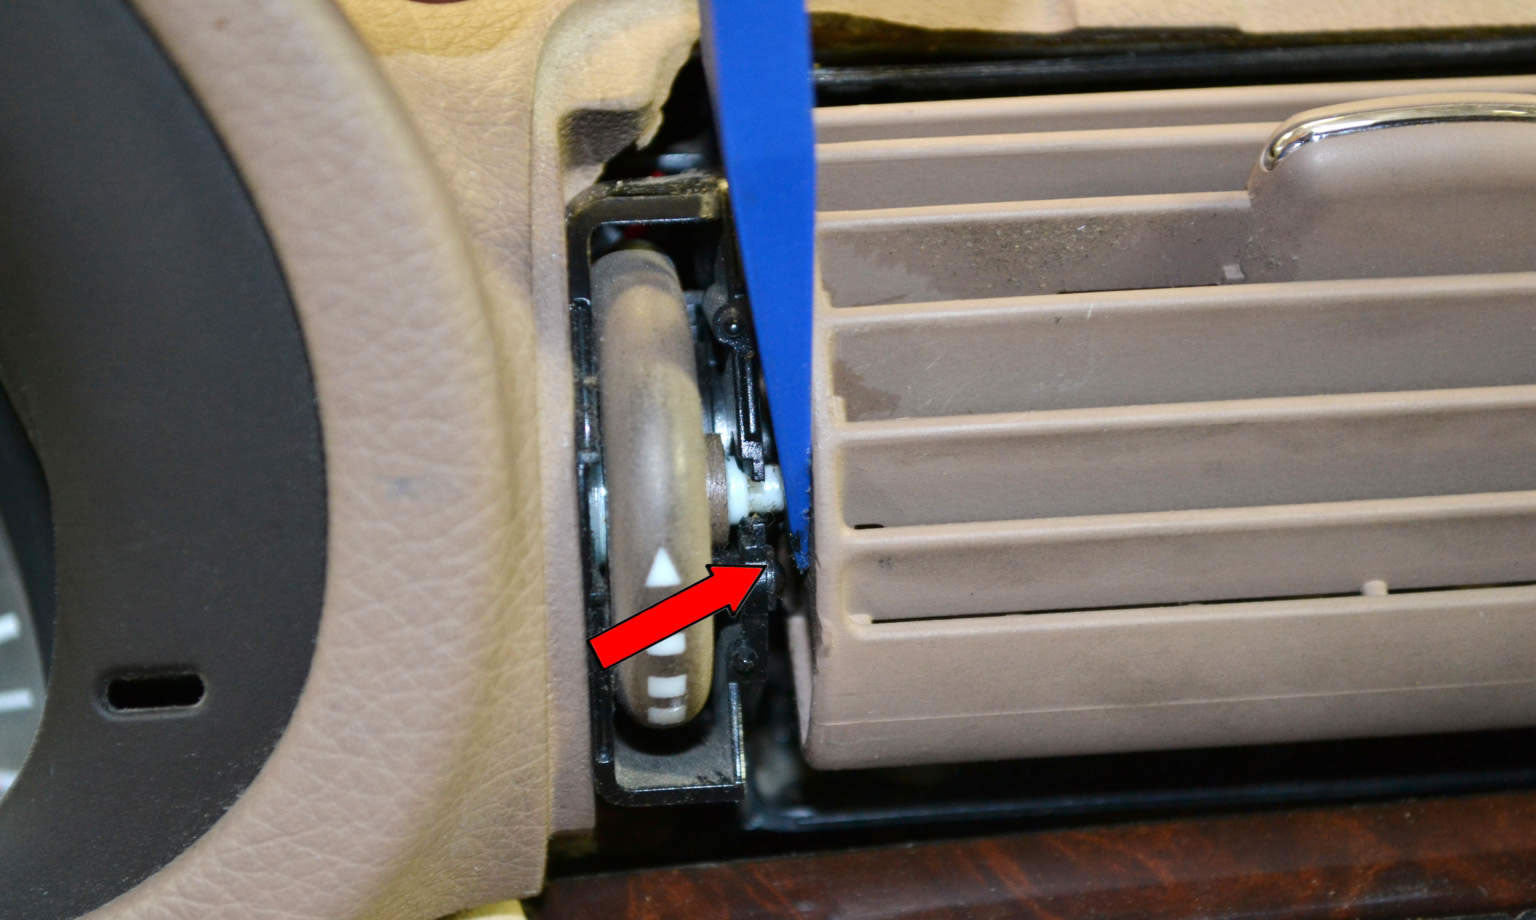
14) On the left side of each vent is a small tab that stops the vents from turning all the way upwards. Insert your trim tool and compress the tab (red arrow).
15) Turn both vents all the way upwards. This will give you access to the two T20 Torx screws (yellow arrows) holding the lower vents to the console. Remove the two screws.
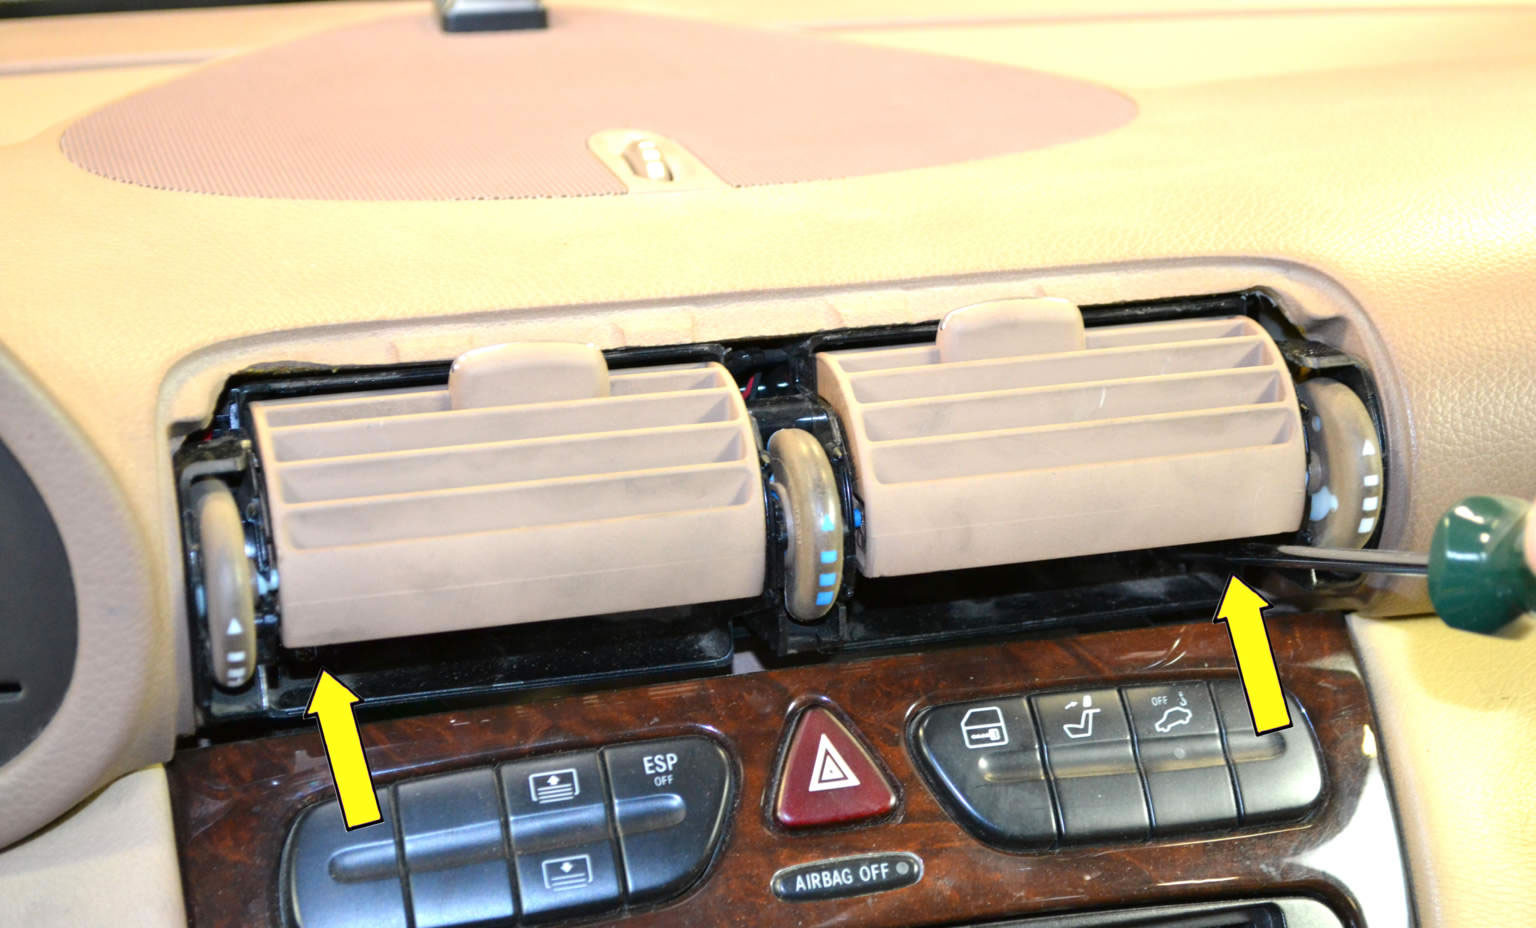
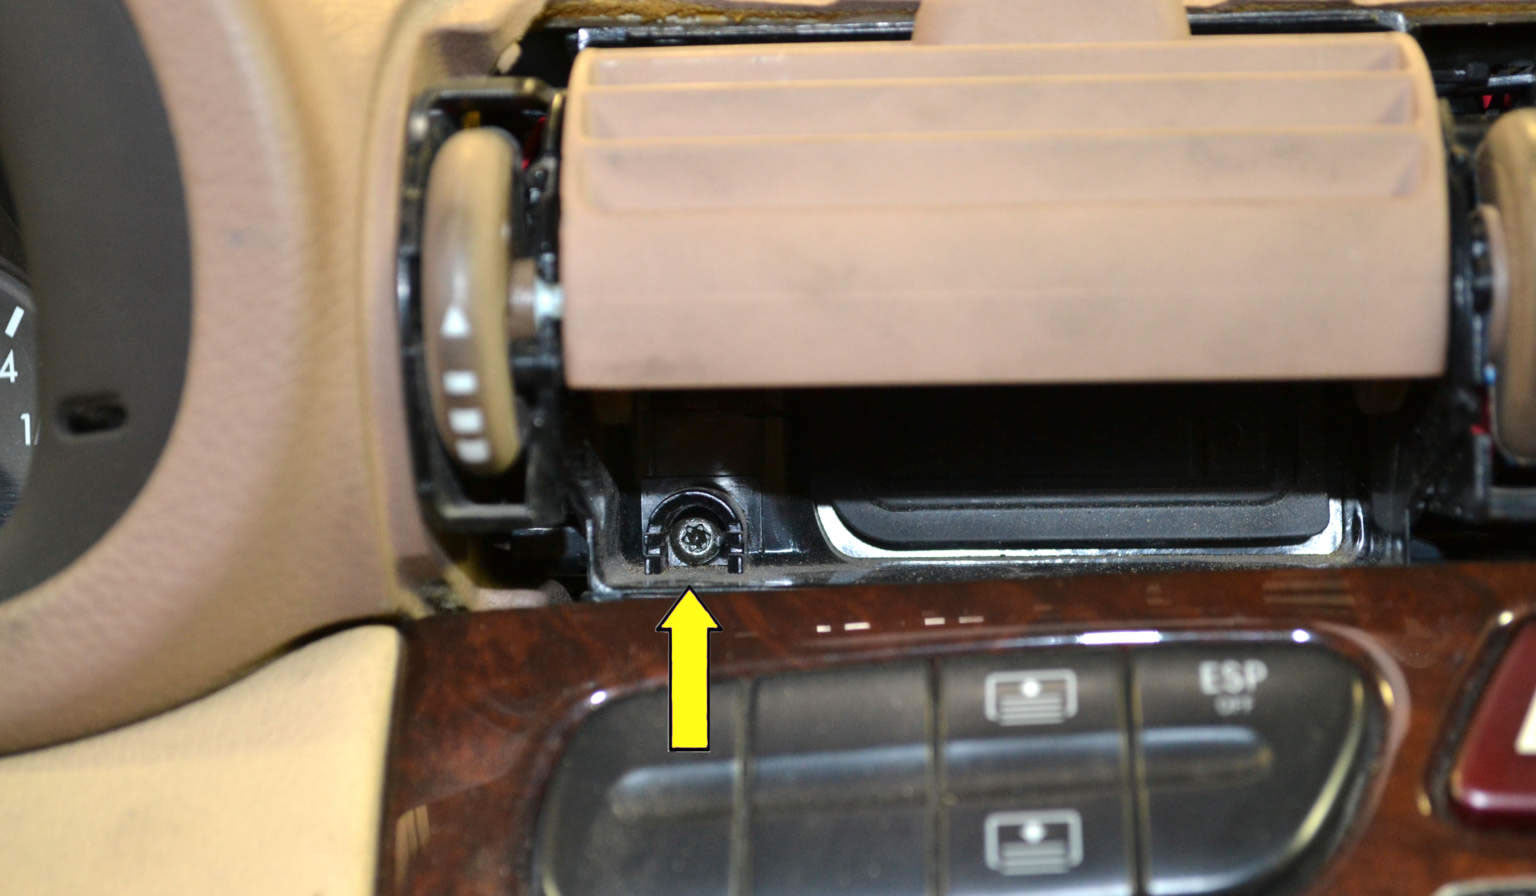
16) This shows the hidden T20 Torx screw (yellow arrow).
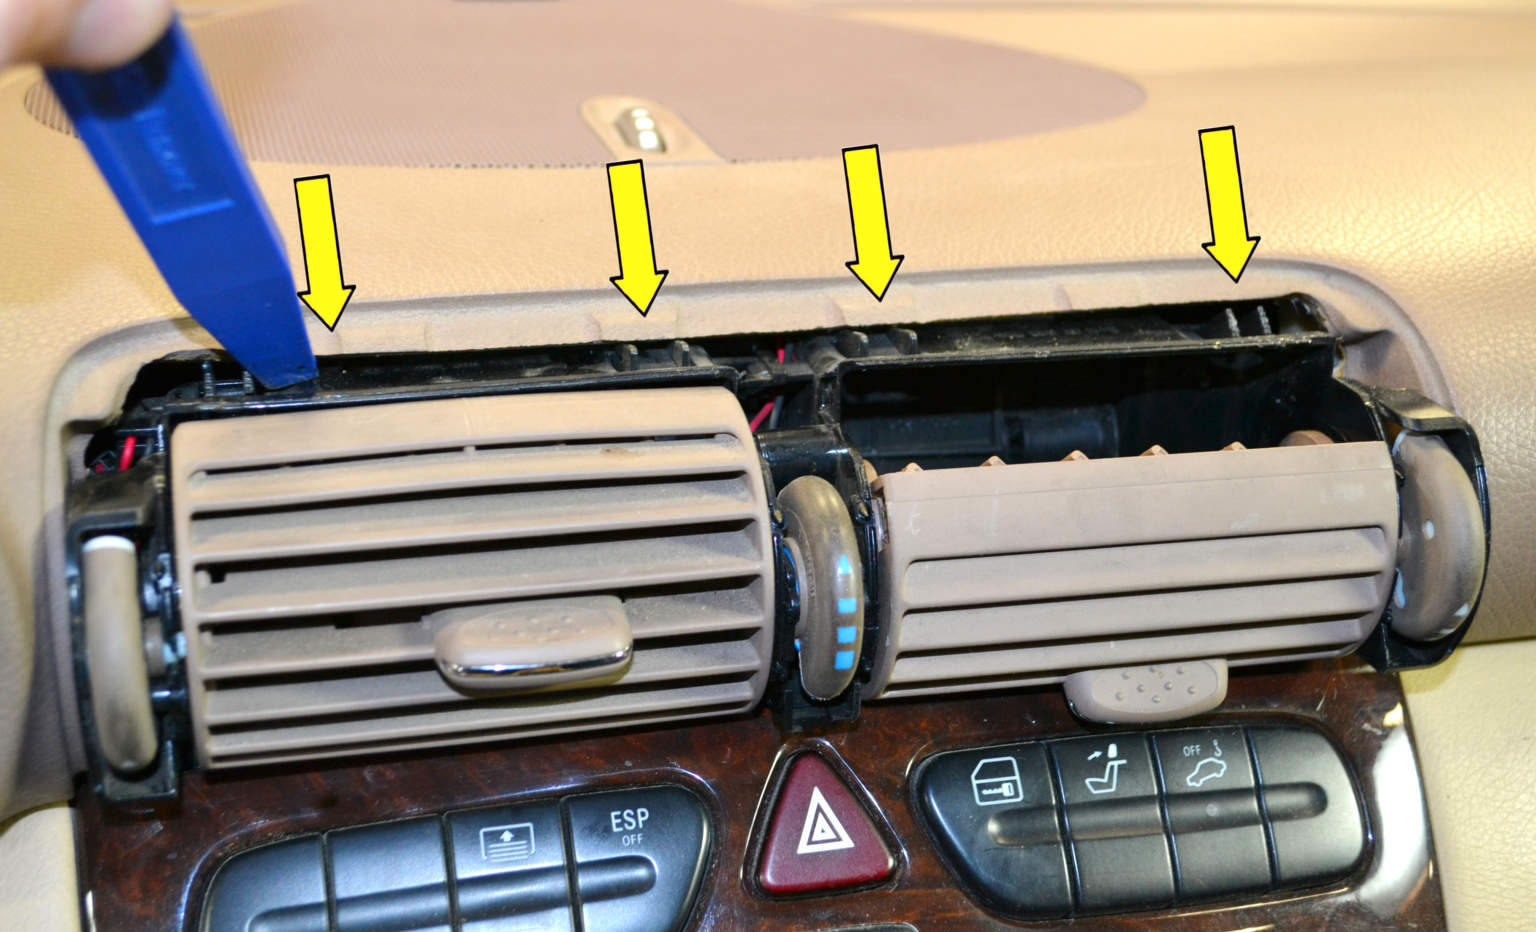
17) Use the trim removal tool and gently pry down the four clips (yellow arrows) holding the top of the vents to the dash.
18) Pull the vents out and disconnect the wiring (yellow arrow). You can now see the two T20 Torx screws (red arrows) holding the upper part of the climate plate to the dash. Remove these.

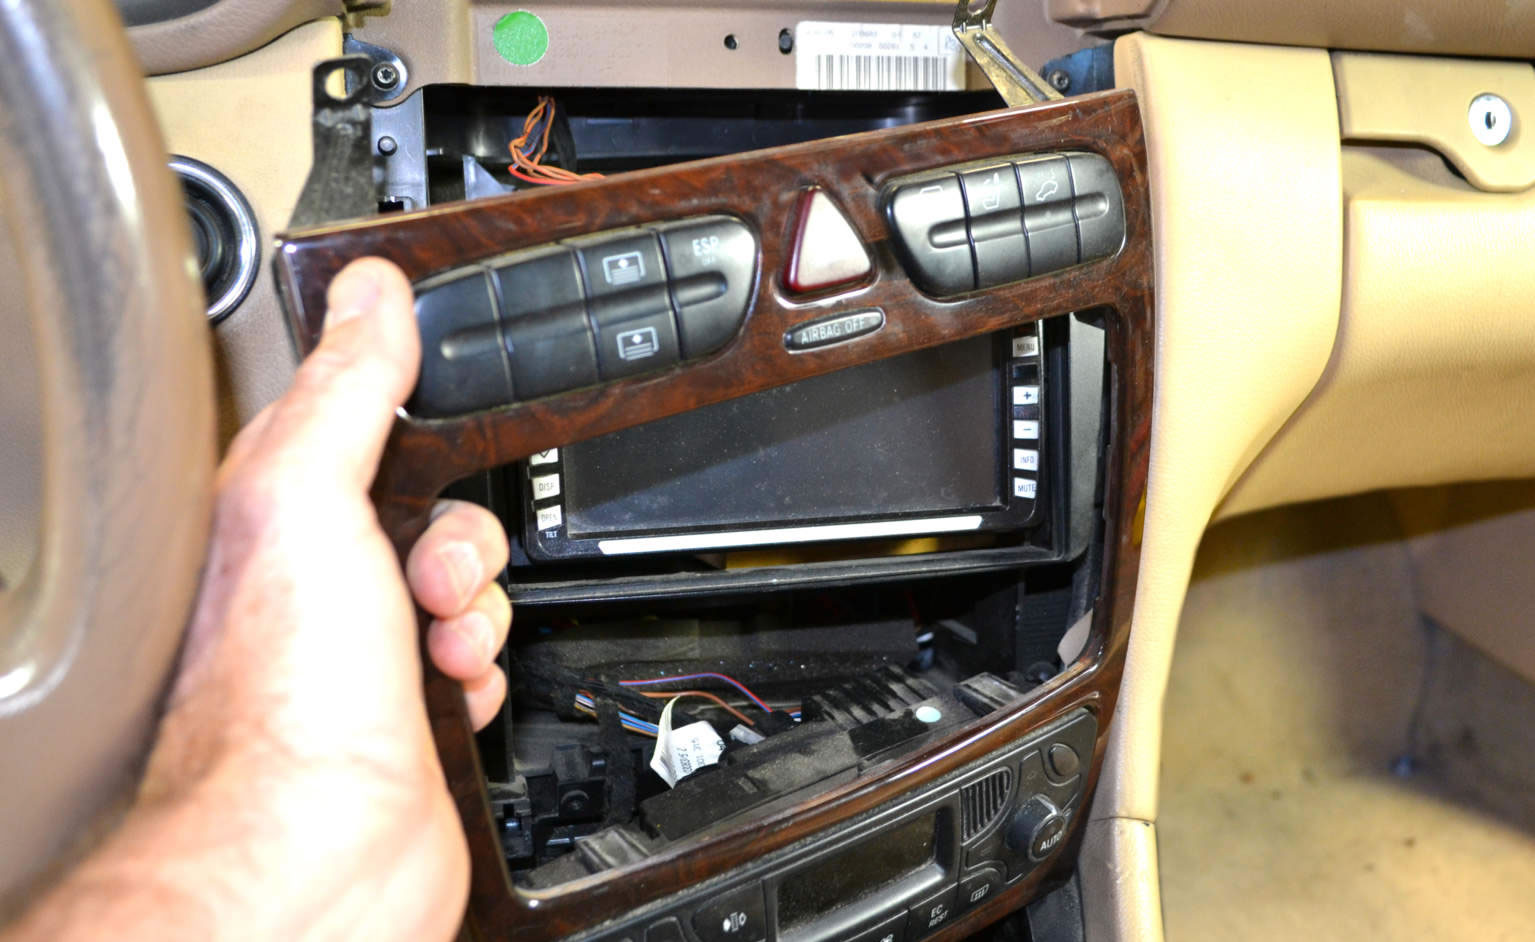
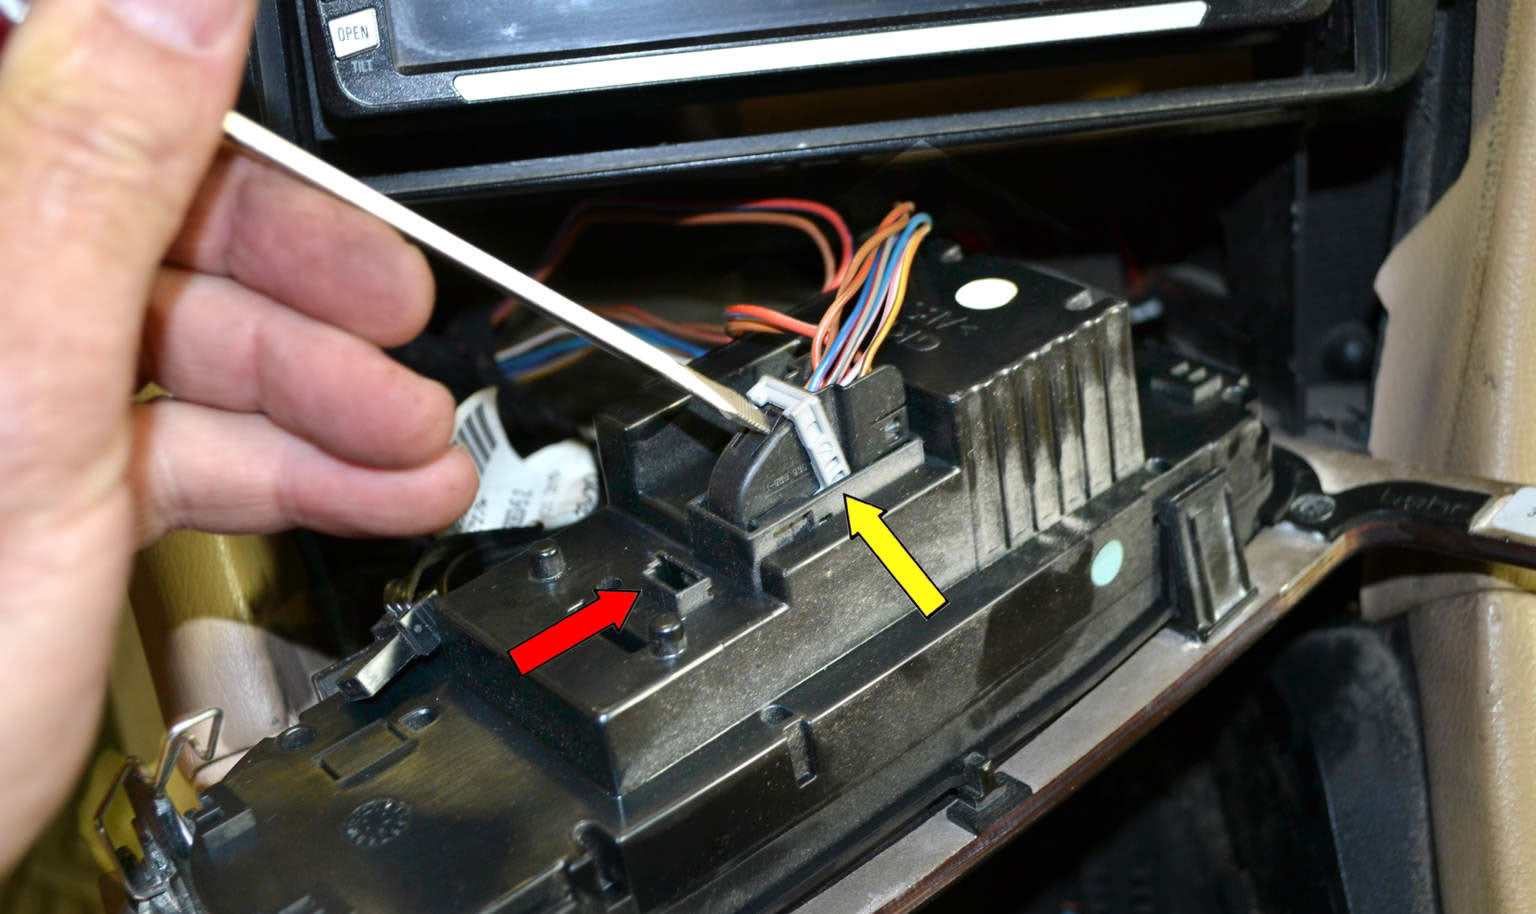
19) With everything loose, wiggle the face plate out of the console. Disconnect the upper wires and the lower ones.
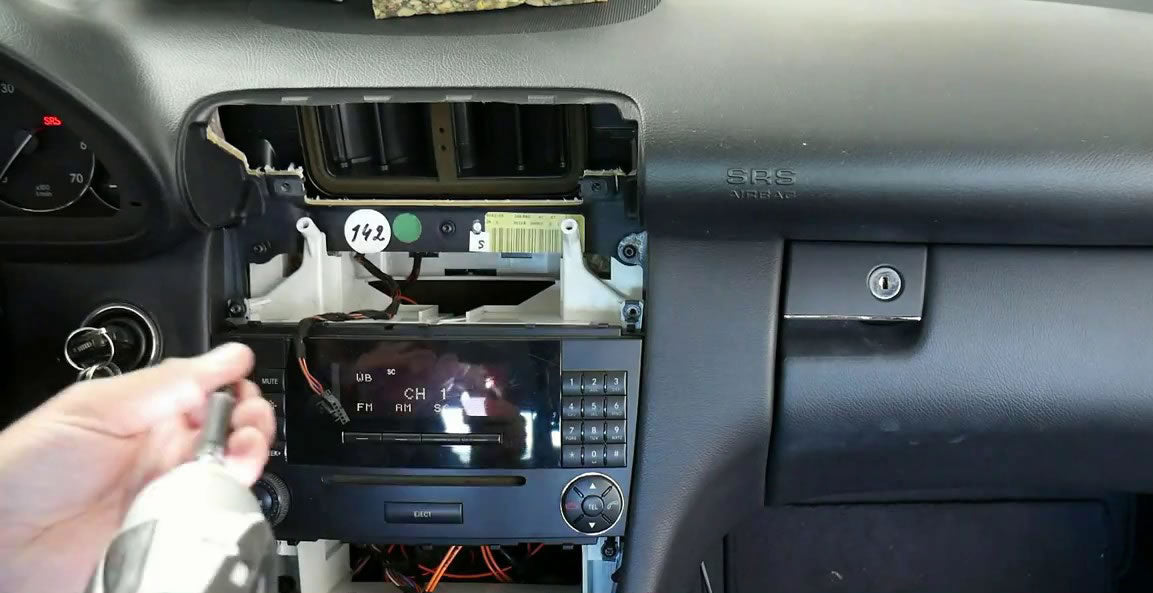
20) The lower climate control has two connections: one simply unplugs (red arrow) and the other (yellow arrow) you will need to press in the retaining clip and then slide the grey arm down releasing the clip from the housing.
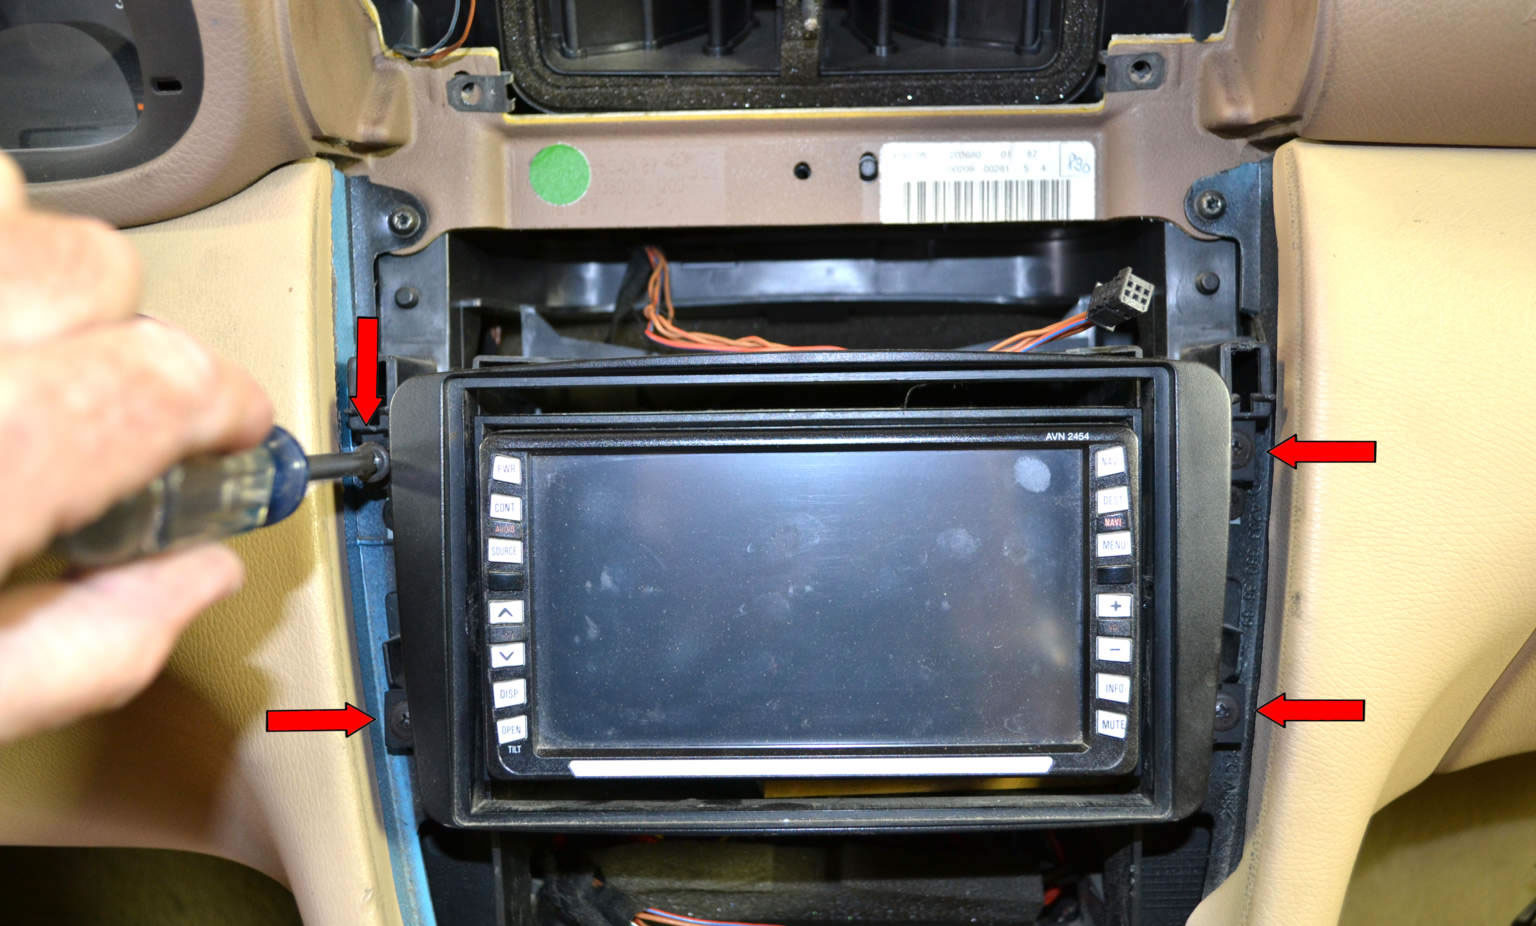
21) You should now have access to your stereo. Stereos will vary in these cars depending on original equipment or after market installations. Our project car came with some awful home installation stereo hidden behind the four factory screws (red arrows).
Installation Mercedes-Benz W203 car stereo is the reverse of removal.